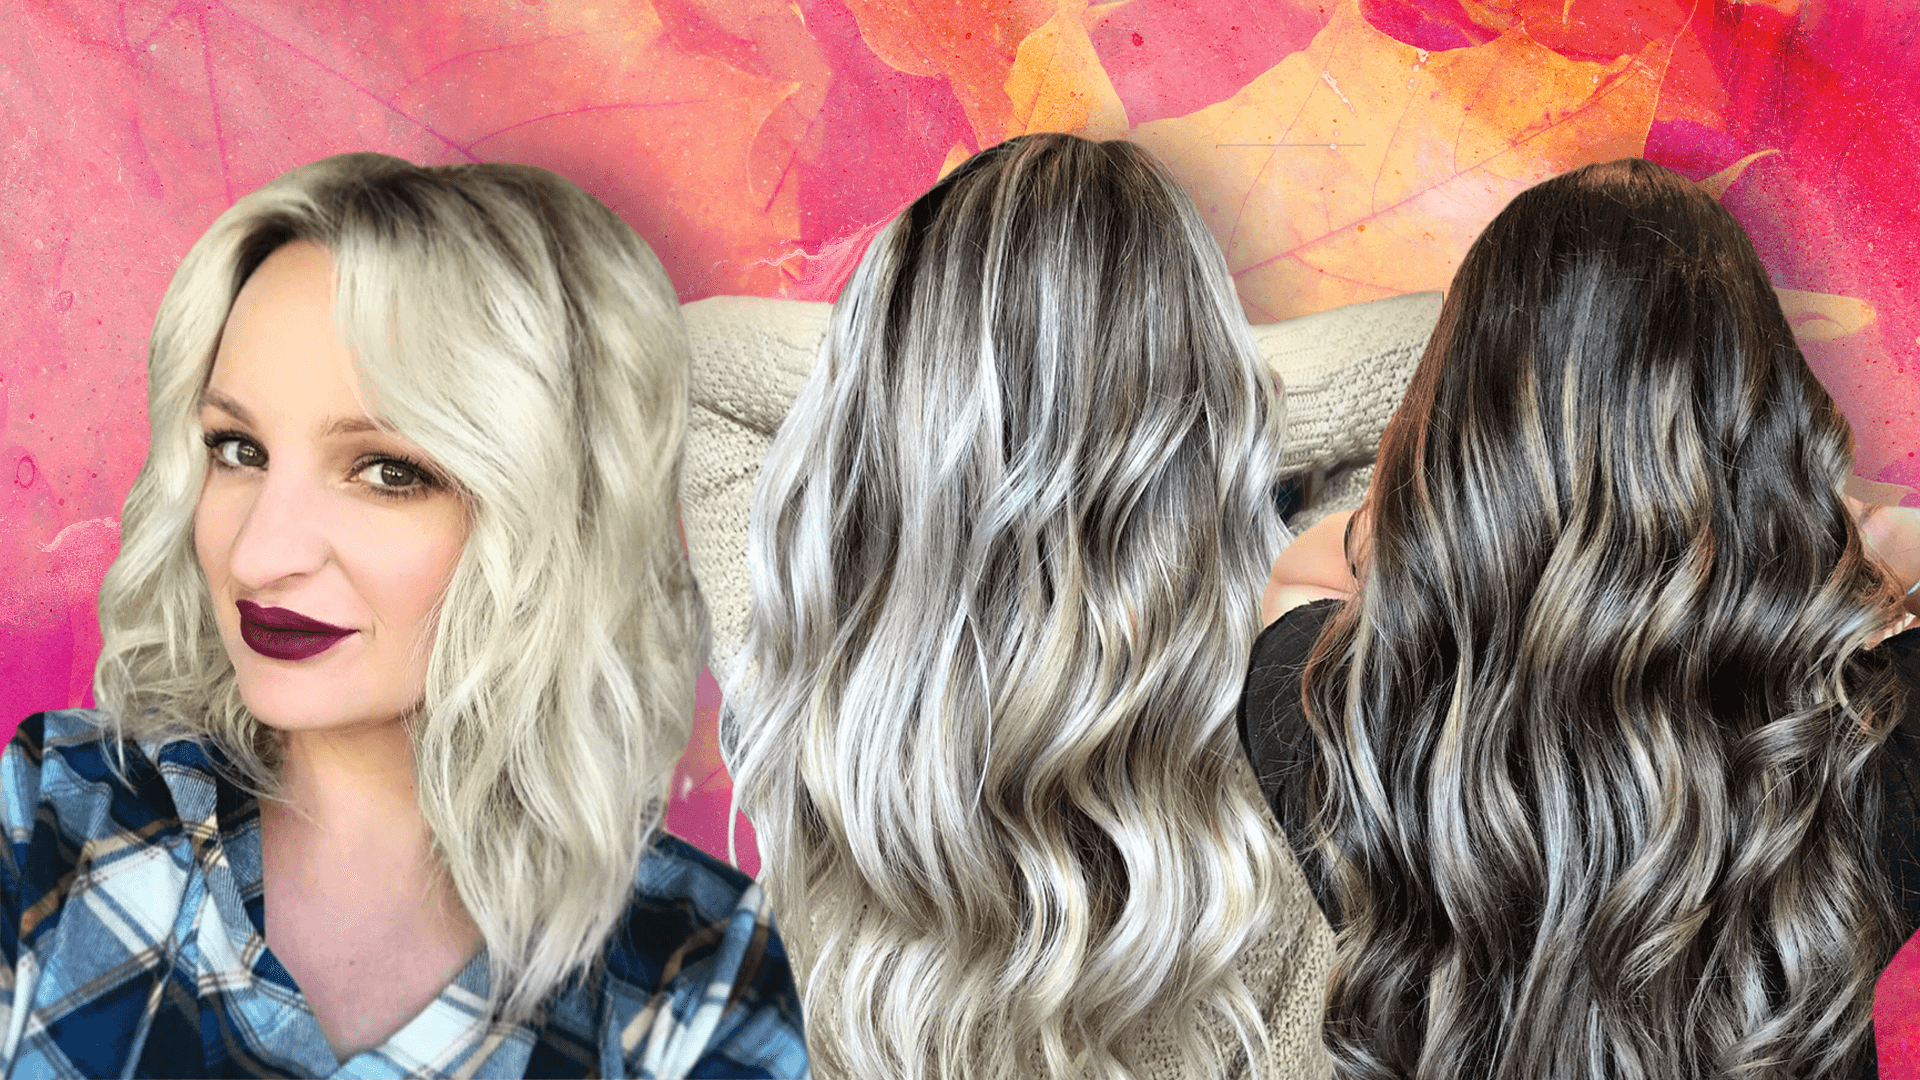
Ahh, fall. A time of change — and I’m not just talking about the leaves! As clients get ready to trade in their bright summer locks for something different, fall becomes the trend-setting season for colors and techniques. This year, “Reverse Balayage” is taking over the industry and is bound to be your new go-to technique. Let’s break it down.
As you probably know, balayage is a technique for highlighting the hair in which the lightener is painted on to create a graduated, natural effect. Usually with focus on the ends with blending up towards the root. Reverse Balayage uses that same hand-painted technique but focuses at the root and blends a darker shade down toward the ends.
This is my signature technique for adding depth back at the roots and midshaft. It’s totally customizable, with the potential for a slightly darker, warmer or huge transformation right at your fingertips! It all depends on your formulas, placement and sectioning. Also, the multi-tonal, final look can make the hair appear thicker. Finally, adding depth tends to be easier on hair than bleaching, so it’s great for clients who want to give their hair a break for the dryer months.
Techniques
If you have lots of blondes in your salon like I do, I’m sure your clients have asked you for either “something brighter” or “something different, but I want to be blonde again in the spring.” Sound familiar? Although these are two totally different desires, Reverse Balayage is the answer! Hear me out:
Adding Reverse Balayage lowlights into already-blonde hair will make the blonde appear even brighter! Sometimes, I show my clients how by taking a section of their blonde hair and holding it in front of my black apron. When they see how bright their hair looks up against a darker color, they get pumped! Therefore, by using this technique to add a darker ash tone, you can really cool down the whole canvas and make that blonde pop. My most used formula is Redken ShadesEq 06N+07T.
Next, try to pick up the brassy pieces! By making them darker instead of bleaching, you help the health of the hair and give the already-bright pieces some depth to stand out.
For the client who’s bored but will want her blonde back soon, use a demi-permanent color. You’ll be able to lift the color out without the fear of pulling too orange or needing multiple sessions. Because demis fade on tone, your client won’t fade out to a brassy hue (I know you’ve seen it).
Placement
When it comes to placement, balayage makes it easy. Just think of where you would place your typical highlights. Most likely, you would paint the brights around the face, in the crown and on the ends — where the sun would hit. For Reverse Balayage, do the opposite and paint where you want to create shadows. Under the crown, behind the ears and in the nape.
When I’m lowlighting in lighter hair, I use foils. This keeps your sections clean and ensures there won’t be unwanted color transfer to your blonde. Start by placing your foil at the root, applying the color at the top and blending down to the midshaft, with the ends out.
When working on the sides of the hair, paint zone one in the foil and feather down as you work away from the face. For the back, place your section in the foil and pinch the ends to make a “V.” Paint the hollow of the V, leaving the sides and ends free from color.
Back It Up, Back It Up
This technique is one every hairdresser should have on their service menus this season. Find those inspo pics and get ready to change with the seasons! Also, remember not to be afraid of going darker. You can only see those bright stars in the dark sky, right? With a little creativity, proper placement and customized formulas, the possibilities with Reverse Balayage are endless and timeless.


